import urllib.request import json import datetime import random import string import time import os import sys os.system("title WARP-PLUS-CLOUDFLARE By ALIILAPRO") os.system('cls'if os.name == 'nt'else'clear') print('Getting WARP+ Traffic on Github Actions') referrer = os.environ["DEVICEID"] defgenString(stringLength): try: letters = string.ascii_letters + string.digits return''.join(random.choice(letters) for i inrange(stringLength)) except Exception as error: print(error) defdigitString(stringLength): try: digit = string.digits return''.join((random.choice(digit) for i inrange(stringLength))) except Exception as error: print(error) url = f'https://api.cloudflareclient.com/v0a{digitString(3)}/reg' defrun(): try: install_id = genString(22) body = {"key": "{}=".format(genString(43)), "install_id": install_id, "fcm_token": "{}:APA91b{}".format(install_id, genString(134)), "referrer": referrer, "warp_enabled": False, "tos": datetime.datetime.now().isoformat()[:-3] + "+02:00", "type": "Android", "locale": "es_ES"} data = json.dumps(body).encode('utf8') headers = {'Content-Type': 'application/json; charset=UTF-8', 'Host': 'api.cloudflareclient.com', 'Connection': 'Keep-Alive', 'Accept-Encoding': 'gzip', 'User-Agent': 'okhttp/3.12.1' } req = urllib.request.Request(url, data, headers) response = urllib.request.urlopen(req) status_code = response.getcode() return status_code except Exception as error: print(error)
g = 0 b = 0 whileTrue: result = run() if result == 200: g = g + 1 os.system('cls'if os.name == 'nt'else'clear') print("") print("Getting WARP+ Traffic") print("") animation = ["[■□□□□□□□□□] 10%","[■■□□□□□□□□] 20%", "[■■■□□□□□□□] 30%", "[■■■■□□□□□□] 40%", "[■■■■■□□□□□] 50%", "[■■■■■■□□□□] 60%", "[■■■■■■■□□□] 70%", "[■■■■■■■■□□] 80%", "[■■■■■■■■■□] 90%", "[■■■■■■■■■■] 100%"] for i inrange(len(animation)): time.sleep(0.5) sys.stdout.write("\r[+] Preparing... " + animation[i % len(animation)]) sys.stdout.flush() print(f"\n[-] WORK ON ID: {referrer}") print(f"[:)] {g} GB has been successfully added to your account.") print(f"[#] Total: {g} Good {b} Bad") print("[*] After 18 seconds, a new request will be sent.") time.sleep(18) else: b = b + 1 os.system('cls'if os.name == 'nt'else'clear') print("") print("Getting WARP+ Traffic") print("") print("[:(] Error when connecting to server.") print(f"[#] Total: {g} Good {b} Bad")
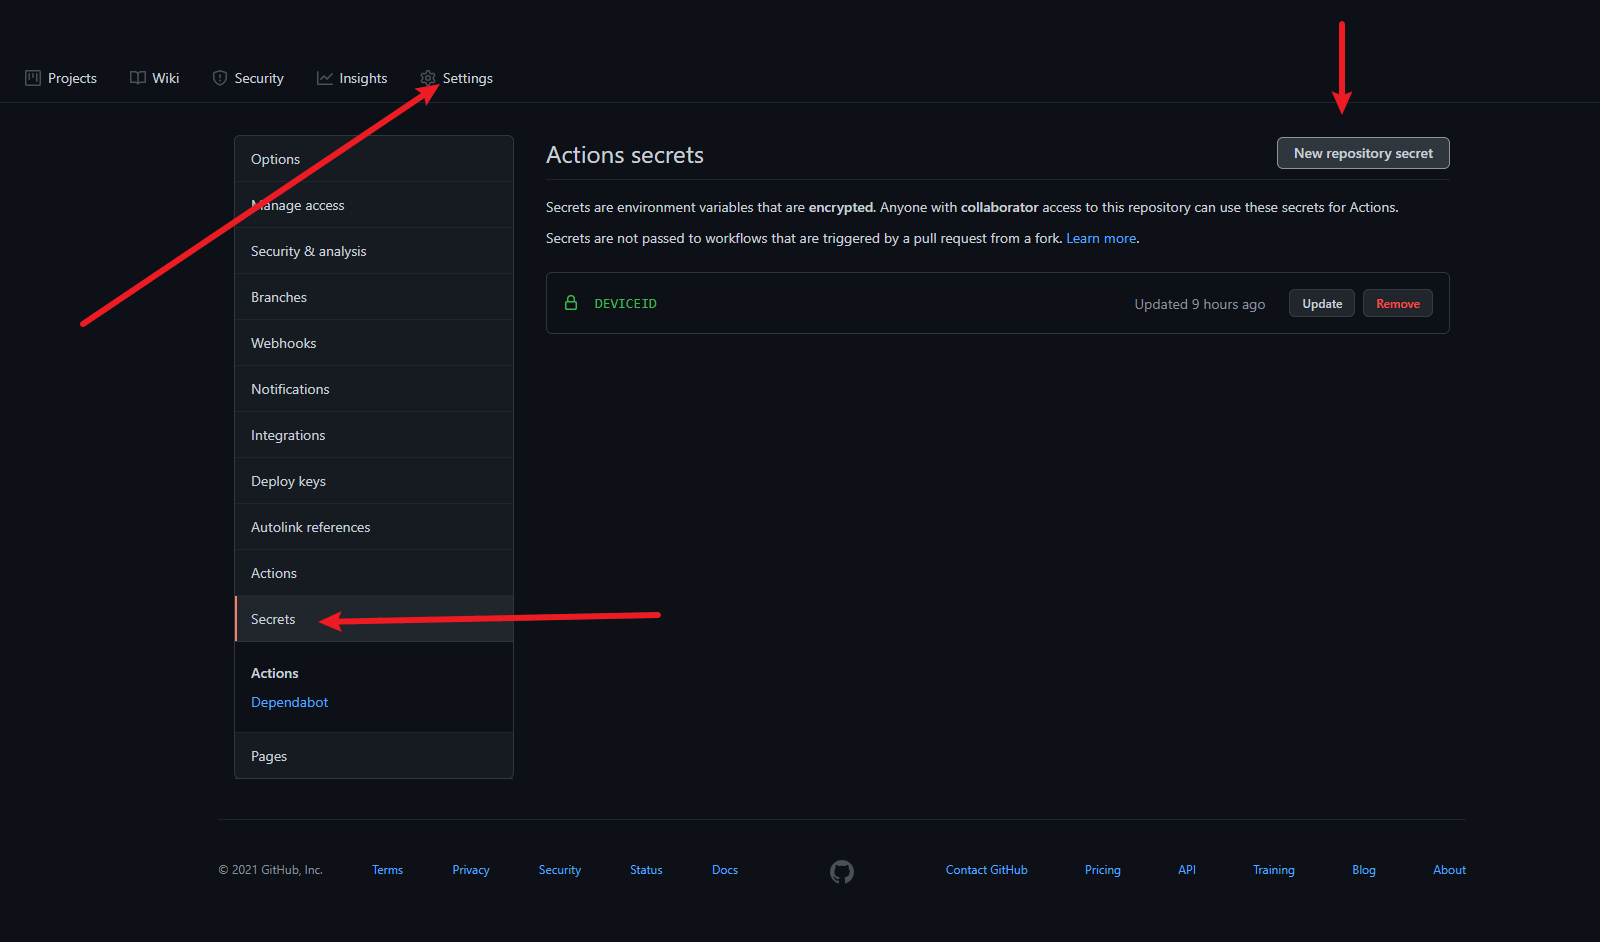
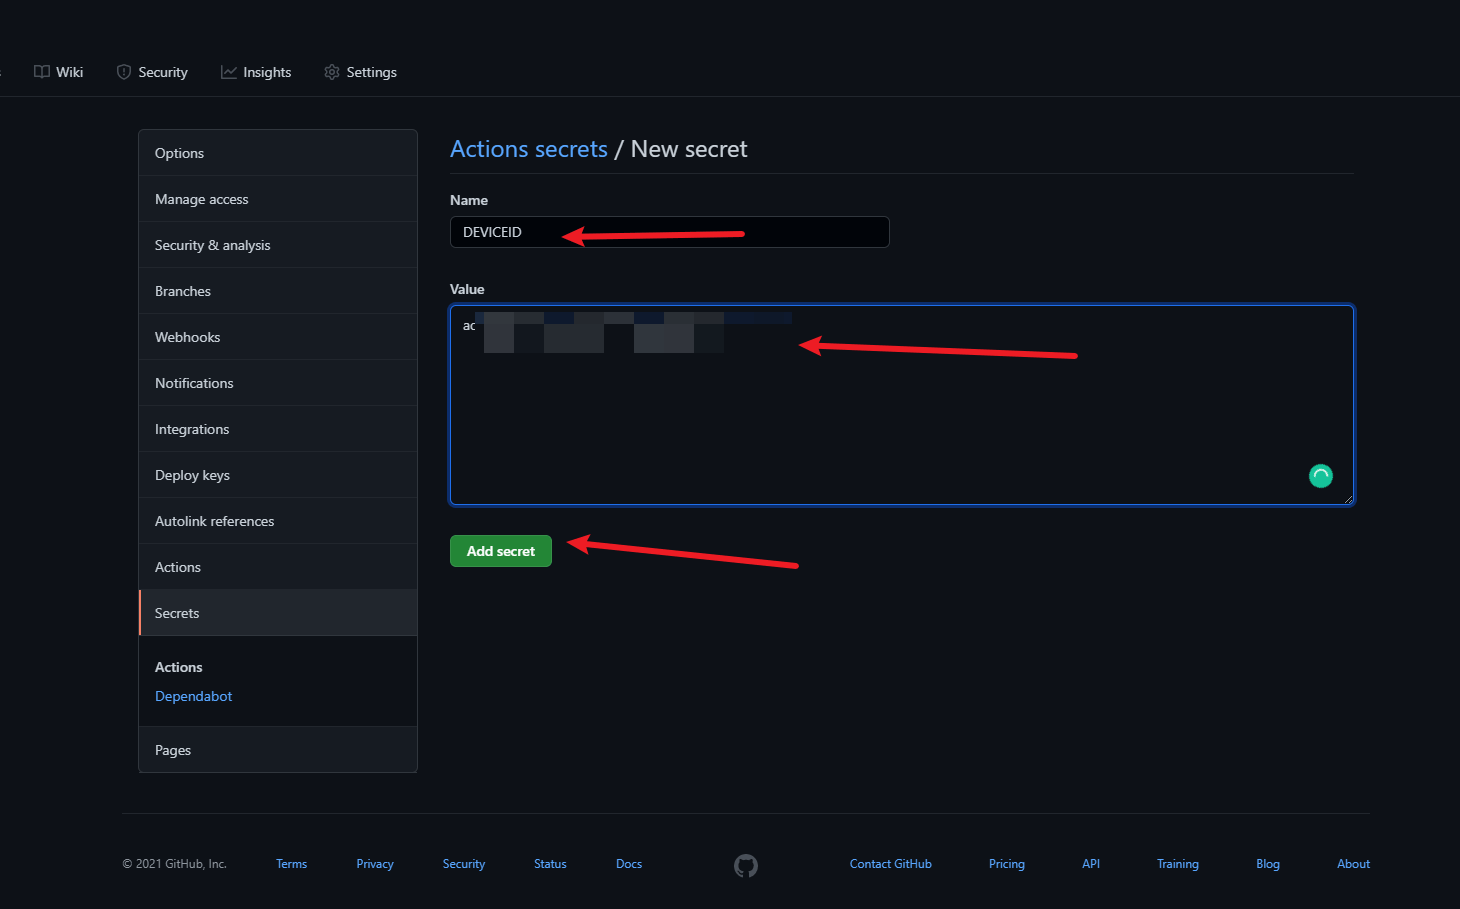
配置GitHub Actions
新建一个私人仓库,名称自拟
上传 warp.py 到该仓库
转到Actions,点击 set up a workflow yourself
复制黏贴以下内容,并点击绿色的Start commit
name: 'Getting WARP+ Traffic'
on: workflow_dispatch: push: branches: - main schedule: - cron: '33 8 * * *'